Install SlackerNews With Embedded Cluster From the Command Line
This tutorial demonstrates how to perform an automated or headless installation for an application distributed with Replicated using the Replicated Embedded Cluster installer.
Introduction
This tutorial shows how to install a Helm chart with Embedded Cluster from the command line without interacting with the Admin Console UI. This is also known as a headless installation. Headless installations are often used for automating application deployment as part of CI/CD pipelines. For more information about headless installs with Embedded Cluster, see Automating Installation with Embedded Cluster.
In this tutorial, you will:
- Download the Helm chart and release manifests for the sample SlackerNews application
- Create a release for SlackerNews in the Replicated Platform
- Create a ConfigValues file to pass application-specific configuration values to the installation from the command line
- On a VM, run the Embedded Cluster
installcommand to perform a headless install of SlackerNews
Set Up Your Environment
Before you begin, do the following to set up your environment:
-
Install the Helm CLI, which is the tool for interacting with Helm and managing Helm charts. See Install Helm.
-
Ensure that you have access to a VM that meets the requirements for Embedded Cluster:
-
Option 1: Use Compatibility Matrix. To use Replicated Compatibility Matrix to create a VM, do the following before proceeding:
-
Request Compatibility Matrix credits. You can request credits by creating a Vendor Portal account and then going to Compatibility Matrix > Request more credits in the Vendor Portal. For more information about creating an account, see Create a Vendor Account. For more information about Compatibility Matrix credits, see Billing and Credits.
noteIf you are new to the Replicated platform, you might be eligible for $100 in free Compatibility Matrix credits. To request your free credits, reach out to our sales team at https://www.replicated.com/contact and note in the comments that you are completing a Replicated tutorial.
-
Ensure that you have an SSH key in your GitHub account. Then, add your GitHub username to your Vendor Portal Account Settings. This will provide SSH access to VMs that you create with Compatibility Matrix. For more information, see Set Up SSH Access in Create VMs.
After you complete the prerequisites above, continue to the Tutorial. You will create the VM with Compatibility Matrix as part of the tutorial.
-
-
Option 2: Bring your own VM. Your VM must meet these requirements:
- Firewalls must allow HTTP and HTTPS traffic.
-
Linux operating system
-
x86-64 architecture
-
systemd
-
At least 2GB of memory and 2 CPU cores
-
The disk on the host must have a maximum P99 write latency of 10 ms. This supports etcd performance and stability. For more information about the disk write latency requirements for etcd, see Disks in Hardware recommendations and What does the etcd warning “failed to send out heartbeat on time” mean? in the etcd documentation.
-
The user performing the installation must have root access to the machine, such as with
sudo. -
The data directory used by Embedded Cluster must have 40Gi or more of total space and be less than 80% full. By default, the data directory is
/var/lib/embedded-cluster. The directory can be changed by passing the--data-dirflag with the Embedded Clusterinstallcommand. For more information, see install.Note that in addition to the primary data directory, Embedded Cluster creates directories and files in the following locations:
/etc/cni/etc/k0s/opt/cni/opt/containerd/run/calico/run/containerd/run/k0s/sys/fs/cgroup/kubepods/sys/fs/cgroup/system.slice/containerd.service/sys/fs/cgroup/system.slice/k0scontroller.service/usr/libexec/k0s/var/lib/calico/var/lib/cni/var/lib/containers/var/lib/kubelet/var/log/calico/var/log/containers/var/log/embedded-cluster/var/log/pods/usr/local/bin/k0s
-
(Online installations only) Access to replicated.app and proxy.replicated.com or your custom domain for each
-
Embedded Cluster is based on k0s, so all k0s system requirements and external runtime dependencies apply. See System requirements and External runtime dependencies in the k0s documentation.
For more information, see Set Up Development Environments for Testing.
-
Tutorial
Create an Application
-
On your local machine, install the Replicated CLI:
-
MacOS
brew install replicatedhq/replicated/cli -
Linux / Windows Subsystem for Linux (WSL)
version=$(curl -s https://api.github.com/repos/replicatedhq/replicated/releases/latest \
   | grep -m1 -Po '"tag_name":\s*"v\K[^"]+')
curl -Ls \
   "https://github.com/replicatedhq/replicated/releases/download/v${version}/replicated_${version}_linux_amd64.tar.gz" \
   -o replicated.tar.gz
tar xf replicated.tar.gz replicated && rm replicated.tar.gz
mv replicated /usr/local/bin/replicated
For more information and additional installation options, see Install the Replicated CLI.
-
-
Authorize the Replicated CLI:
replicated loginIn the browser window that opens, follow the prompt to log in to your Vendor Portal account and authorize the CLI.
-
Create an application SlackerNews:
replicated app create "SlackerNews"noteIf you already have an application named SlackerNews in your Vendor Portal team, you can add a qualifier to the name. For example,
"SlackerNews Tutorial"or"SlackerNews YOUR_NAME". -
Set the
REPLICATED_APPenvironment variable to the application that you created:export REPLICATED_APP=APP_SLUGWhere
APP_SLUGis the unique application slug provided in the output of theapp createcommand.Setting the
REPLICATED_APPenvironment variable allows you to interact with the application using the Replicated CLI without needing to use the--appflag with every command.
Create a Release
-
Run the following command to download a tarball containing the files for the release:
curl -O --create-dirs --output-dir tutorial-headless-install https://docs.replicated.com/slackernews-1.0.1-release.tar.gz -
Untar:
tar -xzf tutorial-headless-install/slackernews-1.0.1-release.tar.gz && rm manifests/slackernews-1.0.1-release.tar.gz -
View the contents:
lsconfig.yaml embedded-cluster.yaml k8s-app.yaml replicated-app.yaml slackernews-1.0.1.tgz slackernews.yamlThe contents include the SlackerNews Helm chart archive (
slackernews-1.0.1.tgz) and various Replicated manifests that are used to define different aspects of the installation experience for the application. -
Lint the YAML files in the directory:
replicated release lint --yaml-dir .noteYou can ignore
infoorwarnmessages for the purpose of this tutorial. -
From the
tutorial-headless-installdirectory, create a release and promote it to the Unstable channel:replicated release create --yaml-dir . --promote UnstableExample output:
• Reading manifests from . ✓
• Creating Release ✓
   • SEQUENCE: 1
• Promoting ✓
   • Channel 2kvjwEj4uBaCMoTigW5xty1iiw6 successfully set to release 1
Create a Customer
-
Log in to the Vendor Portal.
-
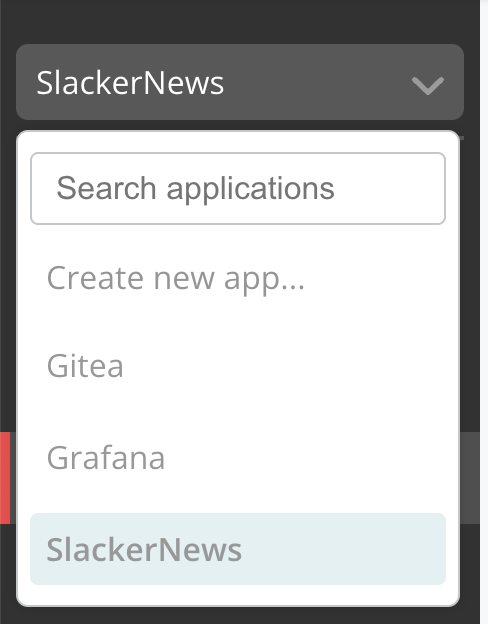
Under the application drop down, select the SlackerNews application that you created.
-
Click Customers > Create customer.
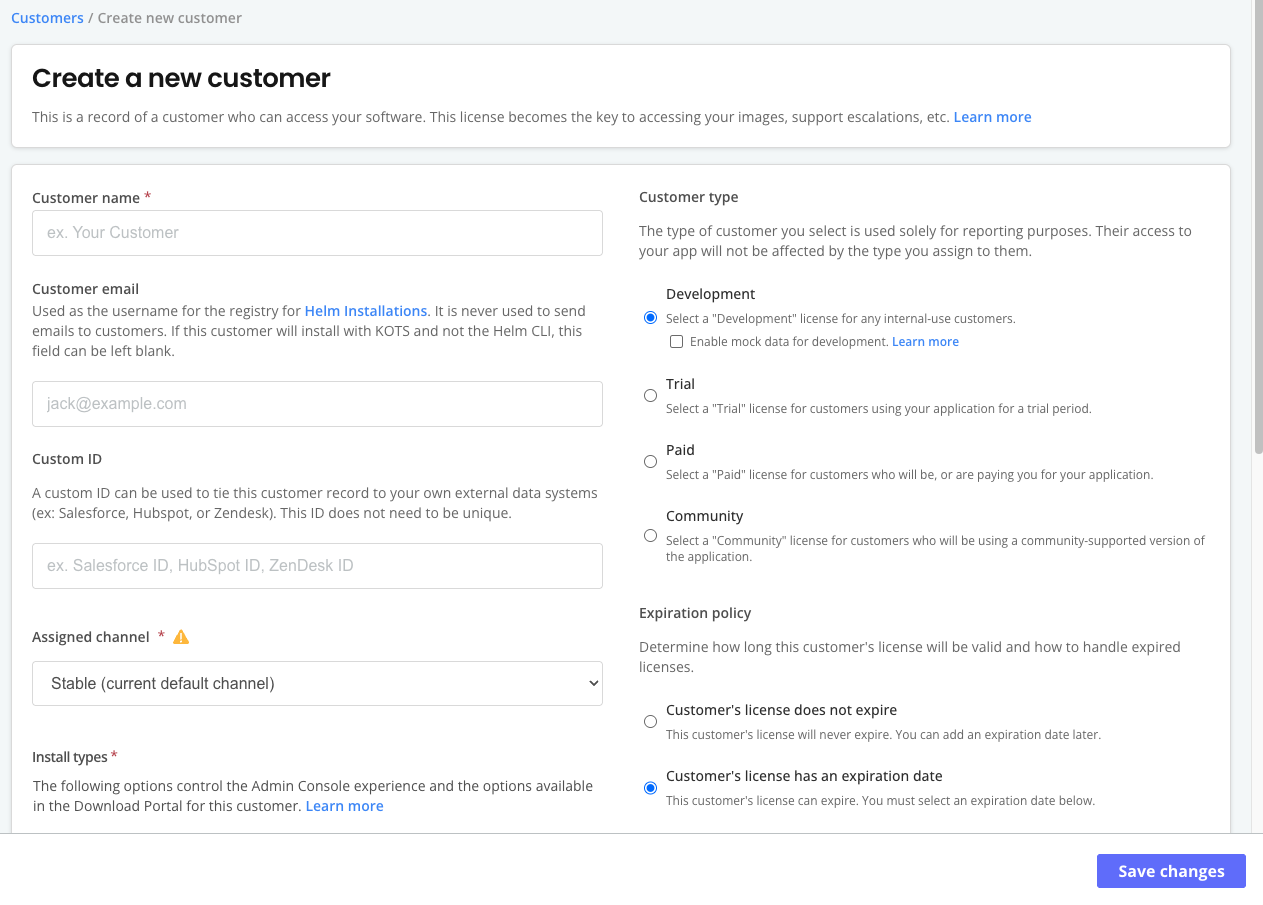
The Create a new customer page opens:
-
For Customer name, enter a name for the customer. For example,
Example Customer. -
For Assigned Channel, select Unstable. This allows the customer to install releases promoted to the Unstable channel.
-
For Customer type, select Development.
-
For Install types, enable Embedded Cluster (current generation product).
-
Click Save Changes.
Create a Compatibility Matrix VM
If you are using your own VM, skip these steps and continue to Create the ConfigValues below.
-
In the Vendor Portal, go to Compatibility Matrix.
-
Click Create > Create VM.
-
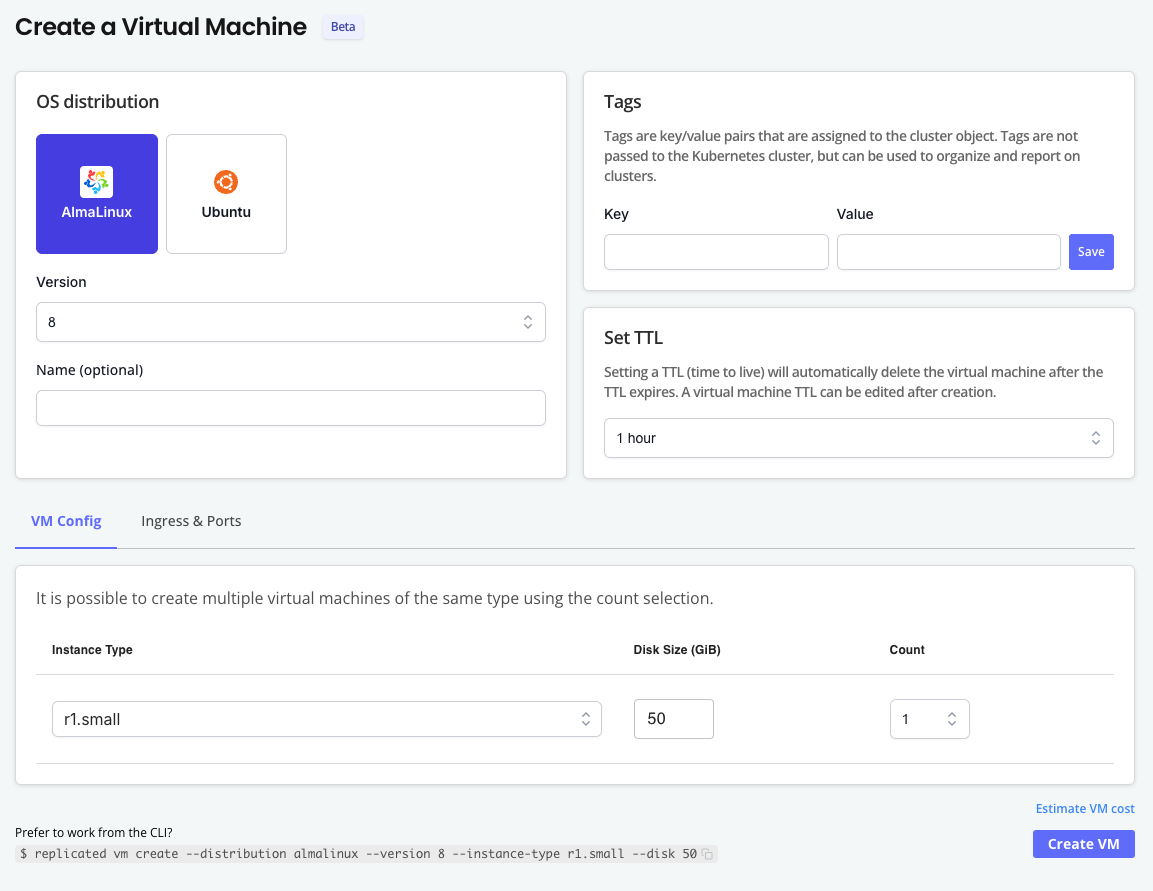
On the Create a Virtual Machine page, complete the following fields:
- OS distribution: Ubuntu
- Version: 24.04
- (Optional) TTL: Optionally increase the TTL for the VM if you want more time to test the installation.
Leave the default values for the remaining fields.
-
Click Create VM.
-
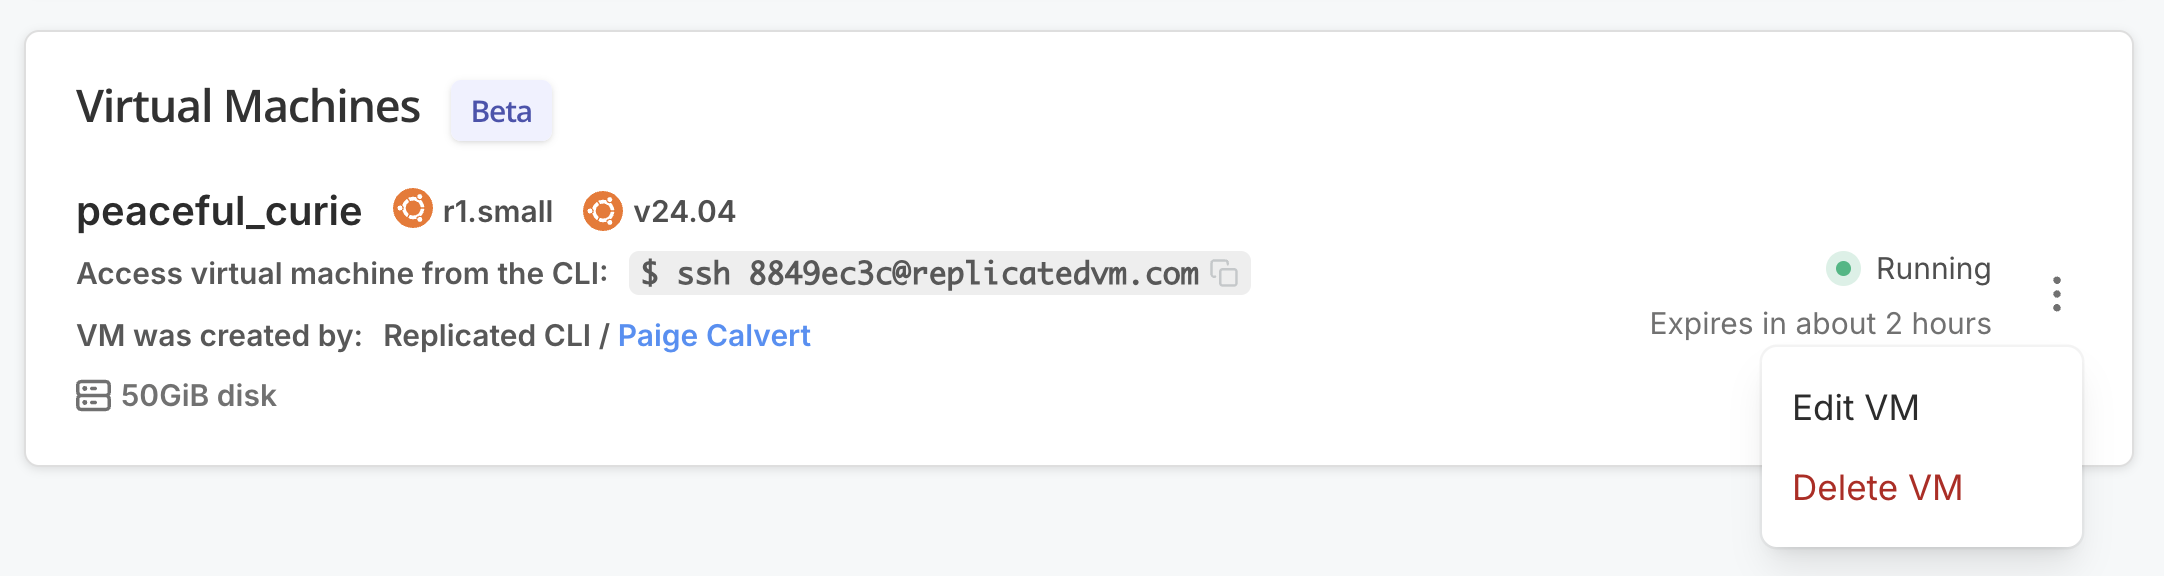
Open the dot menu for the target VM and click Edit VM.
-
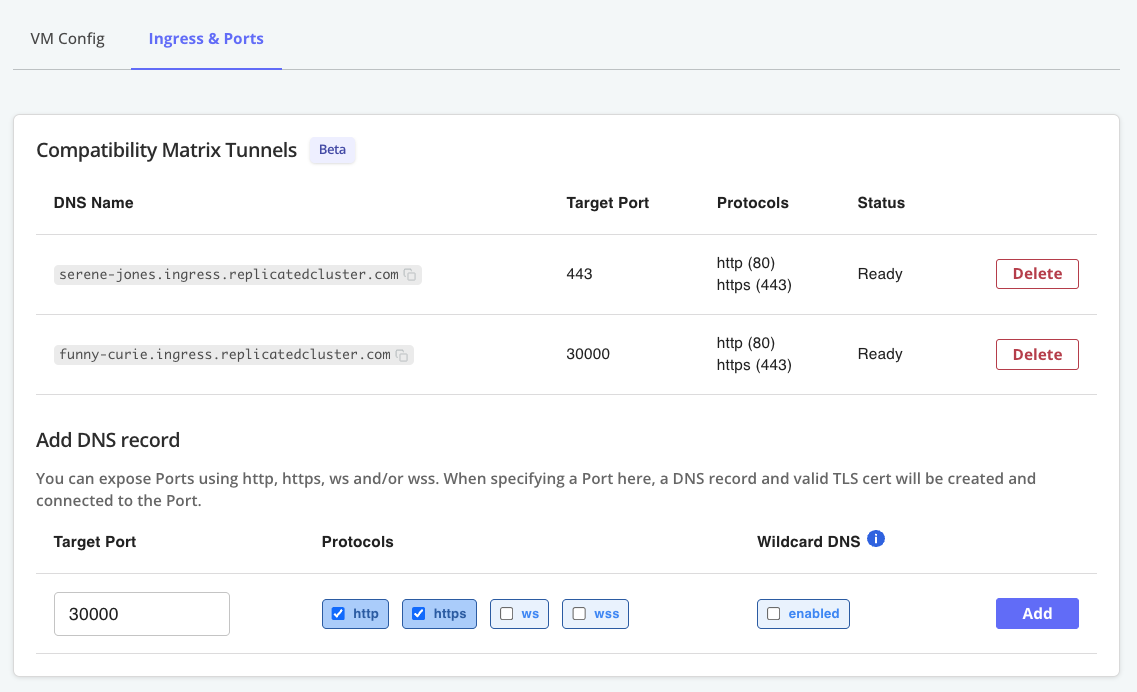
Under Ingress & Ports, for Add DNS record, click Add to create a DNS record using the default settings. This will provide a hostname where you can optionally access the Admin Console after you install.
-
Add another DNS record with a Target Port of 443. This will provide a hostname where you can access SlackerNews.
The following shows an example of both of these DNS records added to a VM:
-
Copy the URL for the DNS record with a target port of 443 (the hostname for accessing SlackerNews) and save it somewhere on your local machine. You will provide this hostname in the ConfigValues file that you create in the next step.
Create the ConfigValues
-
On your local machine, create a ConfigValues file:
touch slackernews-configvalues.yamlThe ConfigValues file allows you to set application-specific configuration values for SlackerNews from the command line rather than through the Admin Console UI. You will transfer this file to your VM and then pass it to the installation in a later step.
-
In
slackernews-configvalues.yaml, add the following YAML:apiVersion: kots.io/v1beta1
kind: ConfigValues
spec:
values:
slackernews_domain:
value: YOUR_DOMAINWhere
YOUR_DOMAINis the domain to use for SlackerNews. For Compatibility Matrix VMs, this is the hostname for the DNS record with port 443 that you copied in a previous step.Example:
apiVersion: kots.io/v1beta1
kind: ConfigValues
spec:
values:
  slackernews_domain:
    value: serene-jones.ingress.replicatedvm.com
SSH Onto the VM
-
If you brought your own VM:
- SSH onto the VM.
- Transfer the
slackernews-configvalues.yamlfile from your local machine to the VM.
-
If you are using a Compatibility Matrix VM:
-
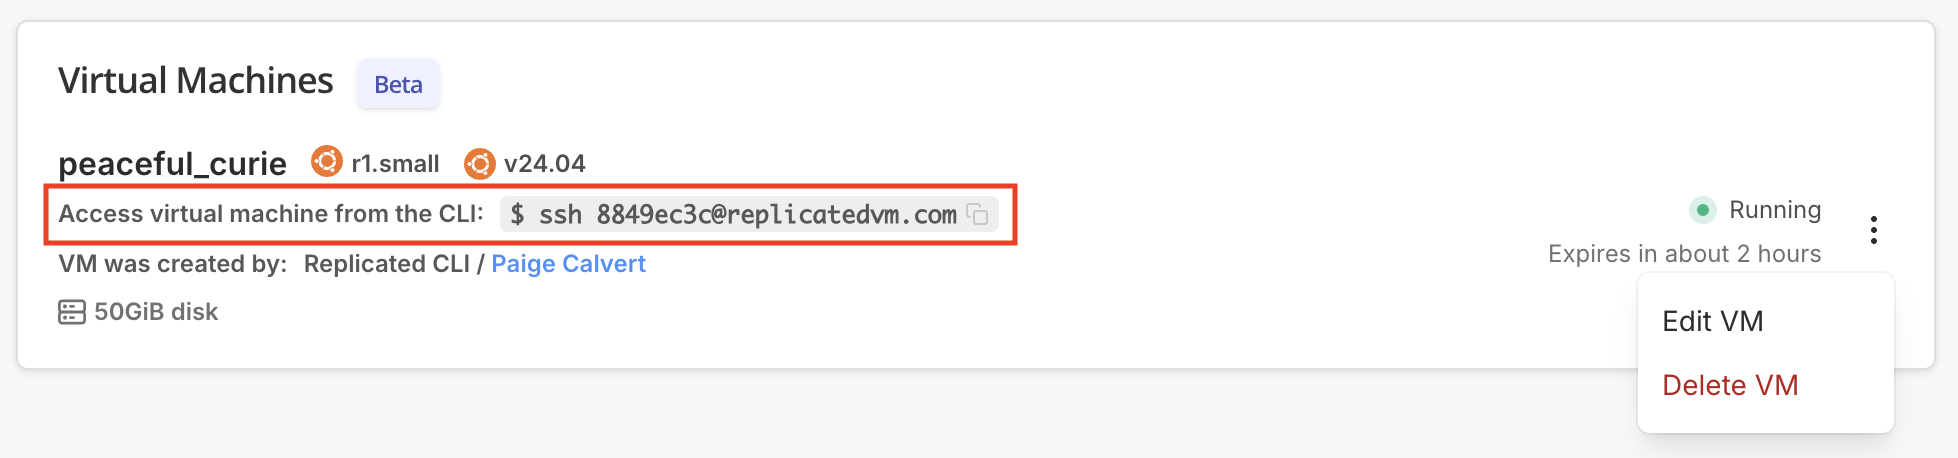
In the Vendor Portal, go to Compatibility Matrix and find the VM under the Virtual Machines provided.
-
Copy and run the SSH command provided.
-
If you are prompted to add the fingerprint for replicatedvm.com, type
yesand press Enter. -
When prompted, provide the passphrase for the SSH key in your linked GitHub account. Compatibility Matrix uses GitHub SSH to provide access to the VM.
-
Open a new command prompt window.
-
In the new windows, get the SCP endpoint for the VM:
replicated vm scp-endpoint VM_IDExample output:
scp://yourusername@37.27.52.178:43663 -
Transfer the ConfigValues file that you created to your VM using the SCP endpoint:
scp PATH_TO_CONFIGVALUES scp://GITHUB_USERNAME@SSH_ENDPOINT:PORTWhere:
PATH_TO_CONFIGVALUESis the path to the ConfigValues file that you created on your local machine.GITHUB_USERNAME,SSH_ENDPOINT, andPORTare all copied from the SCP endpoint that you retrieved.
Example:
scp configvalues-slackernews.yaml scp://yourusername@37.27.52.178:43663 -
When prompted, type
yesto connect to the host. -
When prompted, type your passphrase for your SSH key and press Enter.
-
Return to your VM and confirm that the ConfigValues was transferred.
-
Install
-
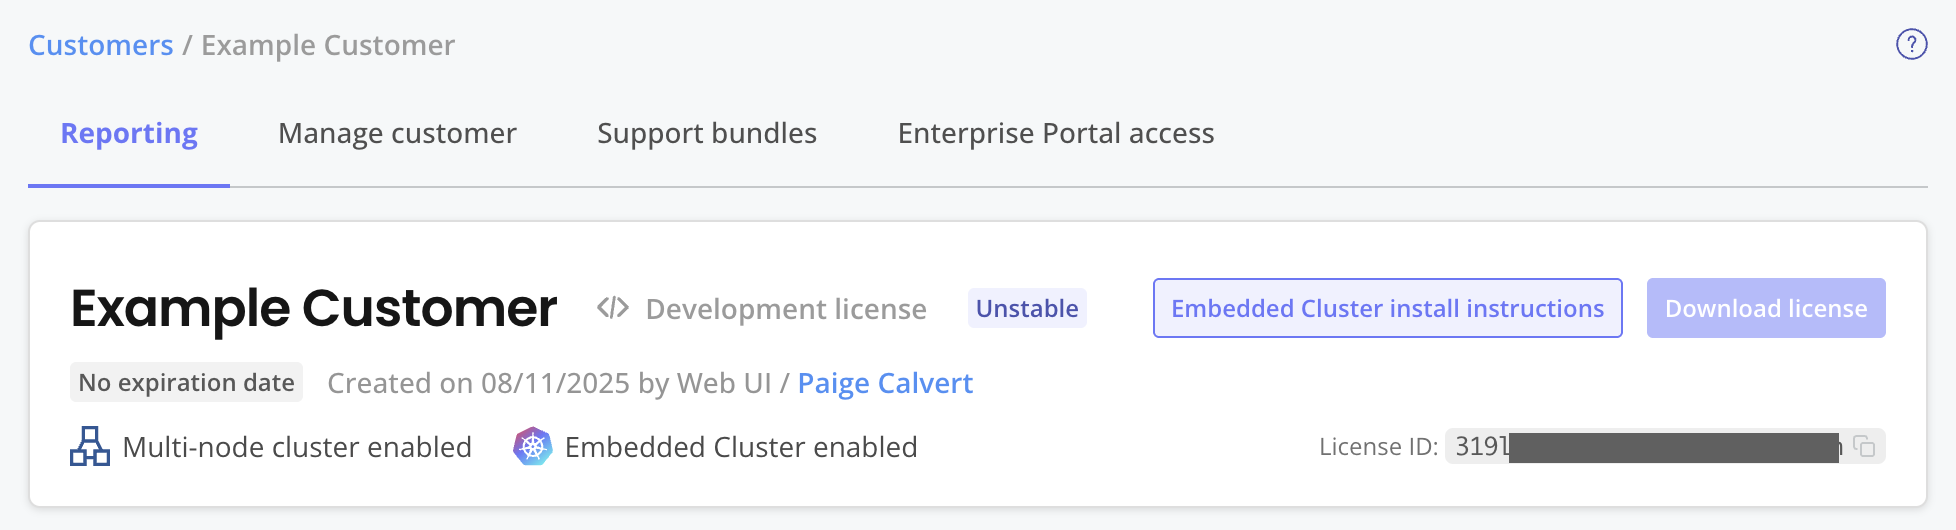
In the Vendor Portal, on the page for the customer that you created, click Embedded Cluster install instructions.
-
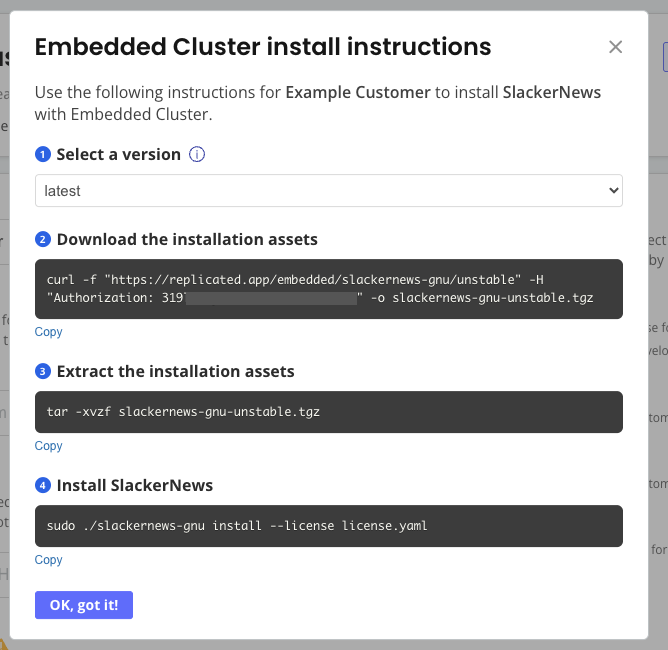
On your VM, run the first two commands in the Embedded cluster install instructions dialog to download the latest release and extract the installation assets.
Do not yet run the installation command.
-
Copy the
installcommand from the dialog. Then, add--config-valuesand--admin-console-passwordflags, as shown below:sudo ./APP_SLUG install --license license.yaml \
--config-values PATH_TO_CONFIGVALUES \
--admin-console-password ADMIN_CONSOLE_PASSWORDWhere:
APP_SLUGis the unique slug for the application.PATH_TO_CONFIGVALUESis the path to theslackernews-configvalues.yamlfile on the VM.ADMIN_CONSOLE_PASSWORDis a password for accessing the Admin Console.
-
Run the command to install. The installation takes a few minutes.
-
After the installation command completes, open a shell so that you can interact with the cluster with the kubectl command line:
sudo ./APP_SLUG shell -
Watch for the SlackerNews NGINX deployment to become available:
kubectl get deploy --namespace slackernews --watch -
After the deployment is running, go to the domain for SlackerNews (the domain that you listed in the ConfigValues) to open the application and confirm that the installation was successful.
-
(Optional) Log in to the Admin Console using the password that you set with the
--admin-console-passwordflag during installation:-
Compatibility Matrix VMs: The Admin Console domain is the hostname for the DNS record with port 30000 that you added to the VM. You can find this hostname by going to Compatibility Matrix > Edit VM in the Vendor Portal.
-
If you brought your own VM: The Admin Console URL is provided in the output of the install command.
noteThe IP address in the provided URL might be the private IP address of your VM. You might need to edit the URL to use the public IP address.
-
-
Clean up the installation:
-
If you created the VM with Compatibility Matrix, delete the VM:
replicated vm rm VM_IDWhere
VM_IDis the ID of the VM. You can runreplicated vm lsto get the ID. -
If you brought your own VM, use Embedded Cluster to reset and reboot the VM to remove the installation:
sudo ./APP_SLUG resetWhere
APP_SLUGis the unique slug for the application. You can find the application slug by runningreplicated app ls.
-
Summary
Congratulations! As part of this tutorial, you:
- Created a release with a Helm chart
- Created a ConfigValues file
- Performed a headless install of the release on a VM with Embedded Cluster
For more information about headless installs with Embedded Cluster, see Automating Installation with Embedded Cluster.